The project
Here’s another one that looks a little complicated, but you have to dream a little. Finding an old 15th century door of the right dimensions is mission impossible, so I’m venturing into the making of one that will be sturdy, in oak or chestnut, Kerbeleg’s signature wood which is generously endowed with them. If I can find the right ironwork, it will be reminiscent of the time when this passageway was home to one.


Raw chestnut
It all began with an old block of raw chestnut found in a corner of the Quimperlé carpentry workshop. With its golden veins, slightly acidic smell and perfect density, this wood has character. Before starting to make the door that will separate the Les Oiseaux suite from the landing, in the 15th century passageway, I first want to test the material, understand how it behaves, make a traditional pegged mortise and tenon joint, as the ancients did, and above all learn how to do it. Any mistake is irreversible in this type of work. Alain the veteran and his 45 years of joinery and Edouard the motorcyclist will be my wood Jedi masters for the months to come.

Band saw cutting
The cutting of the block with the band saw begins. The two pieces to be joined take shape slowly, to the steady rhythm of the blade. The cut is clean, and the sound of the band mingles with the light scent of chestnut. The wood is already revealing itself. Edouard’s touch is sure, precise, almost meditative. I’ve forgotten my mask, and I’m already invaded by the dust of the workshop.
Planing and sizing
To familiarise myself with all these new machines and tools, we then move on to planing to bring the pieces to their exact dimensions: forty-two millimetres thick, twelve centimetres wide and strictly square. These are tests for the jambs of the future door. With each pass of the plane, we adjust the flatness and I check the squareness. The wood softens, its surface becomes smooth under the hand. These simple gestures lay the foundations for accuracy.


Scribing the tenon and mortise
Once the pieces have been properly calibrated, I trace the corners, the tenon and the mortise. The pencil glides over the wood, guided by the square and the false square. This is a moment that requires silent concentration. Each line determines the precision of the assembly to come. Half a millimetre’s error and the door components won’t fit together. A correction of one element and it takes on a slightly trapezoidal shape. No room for manoeuvre, if I’m going to make mistakes, I’ll make them now…


Cutting the mouldings with a router
Before cutting the joints, we choose a set of blades together to make the router mouldings. Sufficiently elaborate but not too elaborate for this work reminiscent of old doors. The wood then takes on its first character. The profiles are elegant, sober and regular. The chestnut responds well, is smooth and allows itself to be guided without resistance. The workshop is filled with the warm scent of freshly worked wood.


Cutting with a tenoning machine
Alain prepares the tenoner and adjusts the stops and the toothed blade, reminiscent of a chainsaw, only finer of course. The tenon is cut in several passes. The tenon must be clean, regular and ready to fit together without constraint.


Mortising
We then move on to the mortising machine. The chestnut offers just the right amount of resistance. Edouard’s movements are slow and measured. Each plunge of the bit digs into the material with both force and gentleness. Once the mortise is clear, we finish trimming the edges with a chisel to ensure a perfect fit.
Fitting and blank assembly
It’s time for the first blank assembly. The tenon slides into the mortise with slight resistance but astonishing precision. I spent endless minutes correcting every flaw in my corner cuts with a chisel, one hair of wood at a time, a novice guided by the techniques suggested by my two masters. When everything fits without forcing, I know the attempt has been a success. Those moments are worth all the hours spent at the workbench. My woodworking experts reproached me with a smile for asking too many questions, but their enthusiasm and eagerness to understand the tricks that would help me avoid the pitfalls were quickly understood.
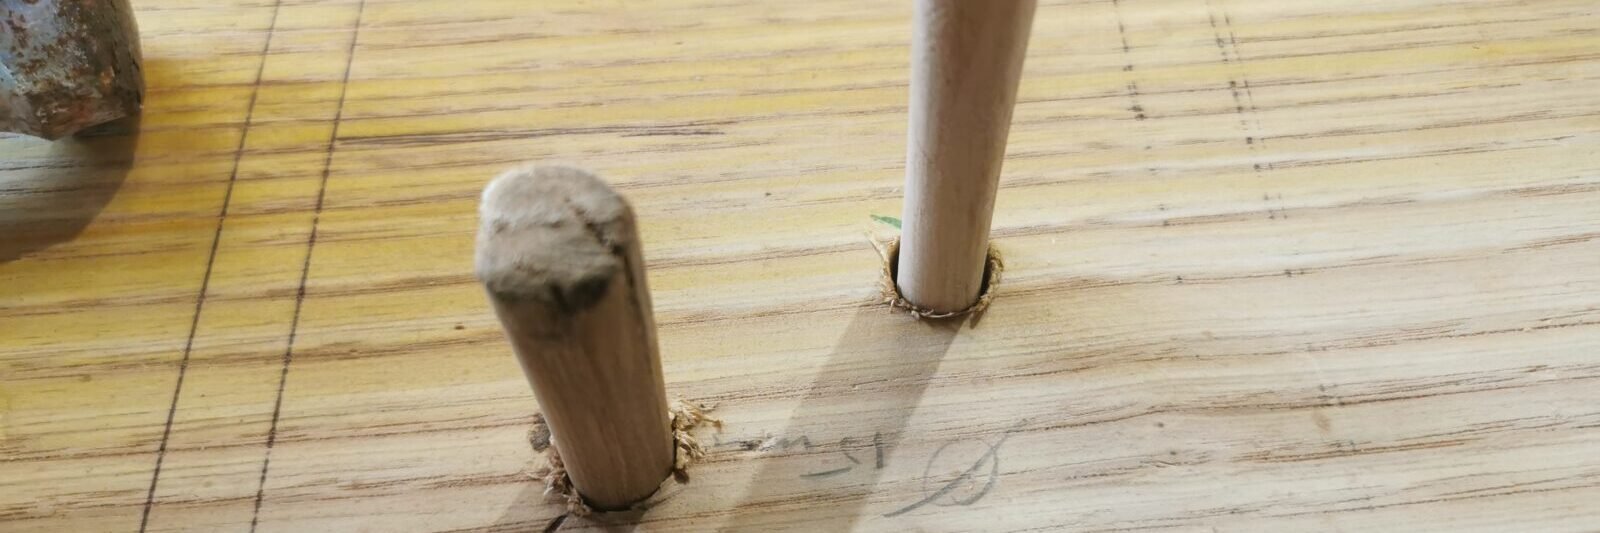
Making and fitting the pegs
Back in Kerbeleg, I cut my dowels in a ‘V’ shape out of the rough wood. This small detail, almost insignificant to the untrained eye, makes all the difference. Each piece of wood is drilled with a slight offset, using the “soft pull” technique. This means that when the dowels are inserted with force, they naturally pull the two pieces towards each other, ensuring a solid clamp without glue. It’s an old-fashioned technique, but an admirably effective one.


Sanding and finishing
I sand the whole thing carefully. Even if it’s just an exercise, I want to get a precise idea of the final result. The wood becomes silky, the chestnut reveals its light. I then apply a walnut stain. This natural patina adds depth, enhances the grain and highlights the mouldings. Finally, I apply a coat of linseed oil. It deeply nourishes the wood, protects it and gives it that soft warmth that is characteristic of work made to last.


The lesson of wood
This first exercise is by no means a masterpiece, but it does have the value of a sincere apprenticeship. In this simple assembly, there is already all the promise of the work to come. This mortise and tenon is more than just an assembly of wood: it is a link between gesture and material, between past and present. This test reminded me of a simple truth: before listening at the door, I’m going to have to learn to listen to the wood. Time is my friend, and I have to cultivate it like my vegetable garden.
